Splendid Delights to Sink Your Teeth Into

We are led by our passions for all things born of the past and found in the present.
Showing posts with label summer. Show all posts

Sunday, July 11, 2010

Baja Tacos


Baja Taco stands are peppered all over Southern California. Most Southern Californians are health conscious. Cycling, jogging, walking, surfing, hiking, etc., are favorite modes of exercise, so what goes into our bodies is important as well. Our family loves to eat these simple tacos. All you need is a barbecue or not and you are good-to-go.
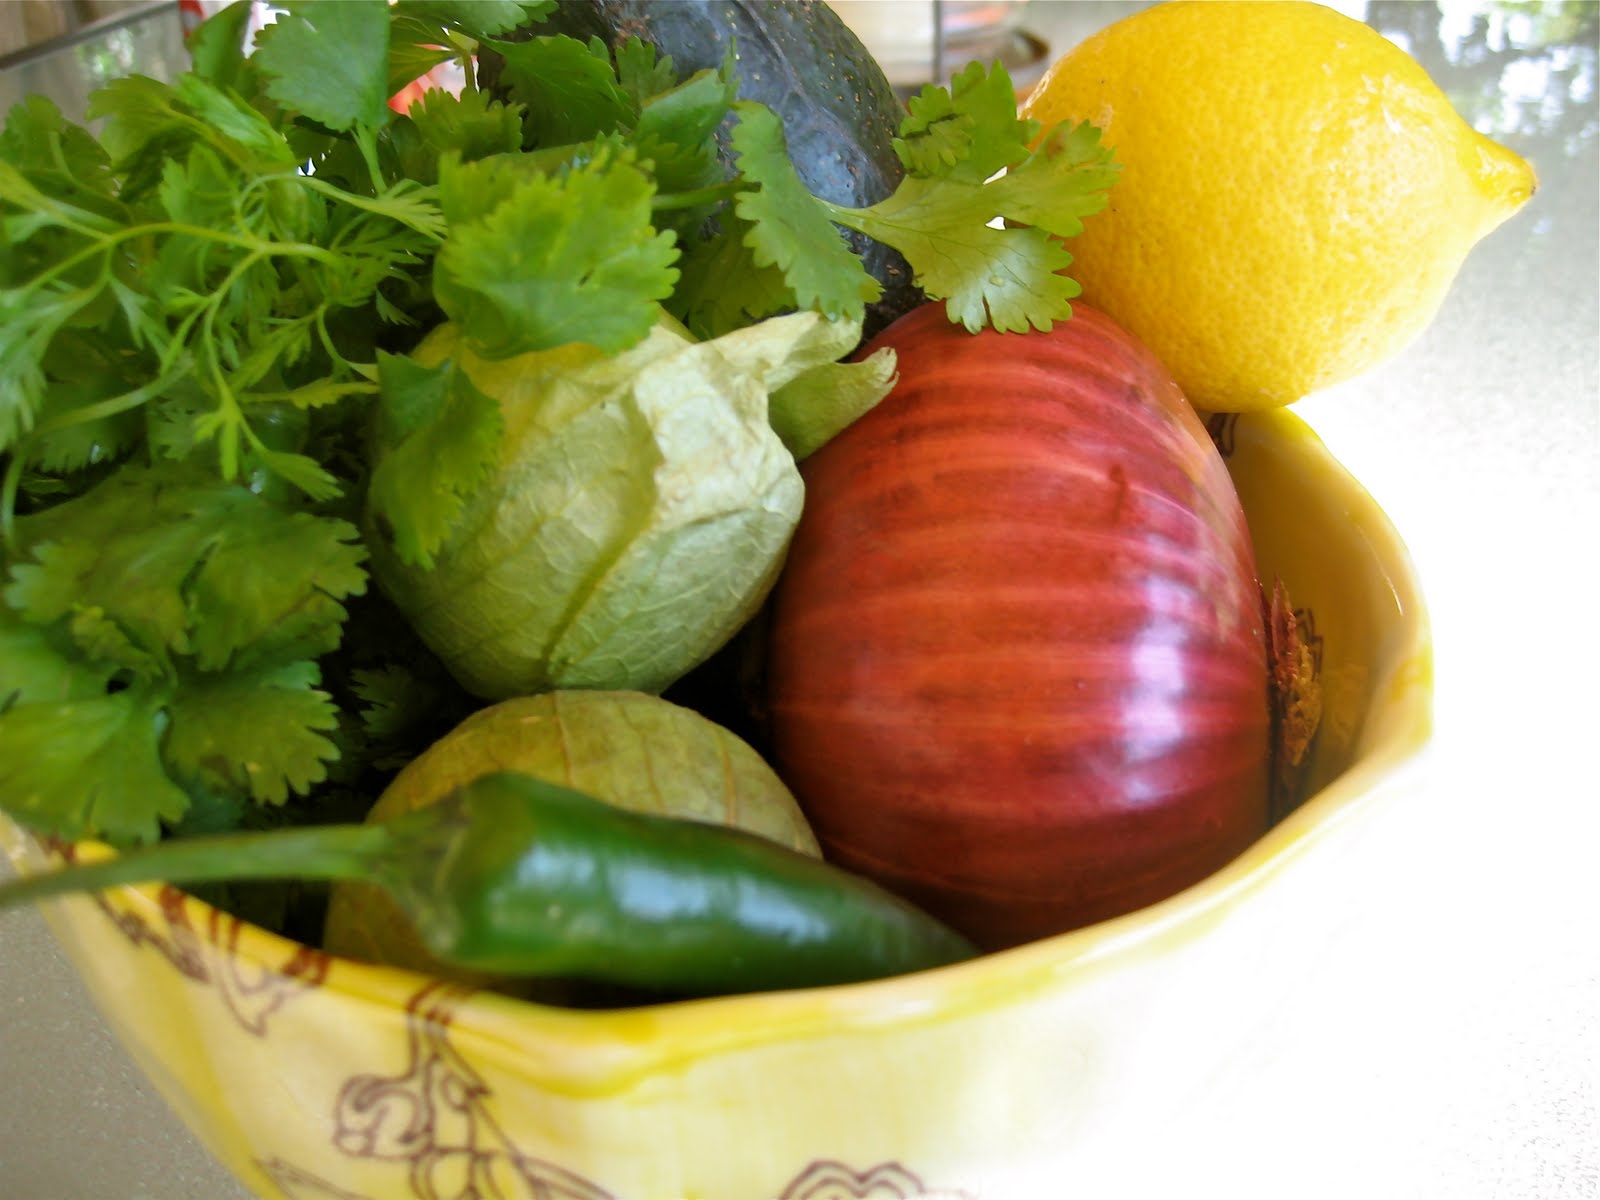
The above ingredients were used to make gucalsa. That's neither guacamole or salsa so I call it gucalsa. Why? Because I've added 2 tomatillo (the ones in the bowl with the papery coverings), and it changes the texture of traditional guacamole. It spoons on tacos easier and adds another flavor dimension. Here's the recipe:

Gualsa
1/2 Serrano chili (use more or less for your taste) remove seeds **careful not to touch your eyes**
Wash your hands thoroughly afterwards. Dice finely.
2 tomatillo, husks removed and cooked in boiling water for 4-5 minutes until tender-not mushy.
2 tablespoons red onion, diced very fine
1 ripe Haas avocado, cut in half, scoop out the insides into a bowl and mash to desired consistency
1/2 teaspoon lemon zest
2 tablespoons lemon juice
2-3 dashes hot sauce (again to your taste)
salt and pepper to taste.
(serves 4)

Remove the top stem from the cooked tomatillo. Place in a blender and puree.
In a medium bowl, add all of the above ingredients. Adjust the seasonings. Cover with plastic wrap until ready to serve.

~Pico Salsa~

3 large red ripe tomatoes
1/2 Serrano chili, seeds removed-seeds are the hottest! Dice finely. (wash those hands well afterwards and don't touch any sensitive areas on your body, ouch!)
Pinch of dried oregano
4 tablespoons red onion, finely minced
3 tablespoons cilantro, leaves only, minced
3 (give or take) dashes Tabasco sauce or hot sauce
2 tablespoons lemon or lime juice
1 tablespoon olive oil
salt and pepper to taste

~Baja Cabbage~

Cabbage is the way it goes down with Baja tacos, otherwise it just isn't a Baja taco.

Ingredients:
Allow 1 handful of cabbage per guest you are serving. For every handful of cabbage add 1 tablespoon of mayo or sour cream and a tablespoon of pico salsa. Stir it to combine all the ingredients. Add a dash of salt and pepper and you are ready to go. Now you can get fancy with shredded carrots, cilantro, etc., but why? Keep it simple!


~Baja Tacos~

Red Snapper fillets, or any fish your family loves to eat
You can add roasted chicken or tri-tip or shrimp. Any simply prepared meat will work. Nothing heavy or fatty though. I also purchased a fully cooked, hot chicken from the market deli to make the prep easier.
corn or flour tortillas
hot sauce
pico salsa
gualsa
Baja cabbage
Lawry's Taco Seasoning
Olive oil

To make the snapper or fish fillets:
Preheat the barbecue.
I use a wire mesh pan, made for barbeque's and found at places like Target, Williams-Sonoma, etc.
I season the fish with salt. I lightly sprinkle with a little olive oil (to keep it from sticking to the pan as it cooks), and a sprinkling of taco seasoning, optional.
Place the wire mesh pan on the hot grill, add the fish and cook (this is the tricky part) until the fish is opaque, but not overcooked turning the fish over part way through the cooking process. Remove from heat and pan and place on the Baja Taco Platter.

~Baja Taco Platter~
I like the grandness of one large platter, laden with all the accouterments. I will have a picture to show you as soon as I photo shop it a little. You see "someone" dug into the food so quickly, I couldn't capture my shot for the blog. It was just a little damage and I should have it up soon. Arrange all the components:
Pico
Gualsa
Baja cabbage
Snapper, fish fillets, tri-tip, shrimp, roasted chicken or whatever meat you are serving
Warmed tortillas (wrap tortilla stack with lightly damp paper towels, then wrap with plastic wrap and warm in the microwave for about 1 minute, test and warm a little more if you need to)
Garnish with some lemon or lime wedges and cilantro

This is "clean food". You will feel good inside after you eat it and your body will thank you. You don't have to make the pico salsa, you can buy it and the same with the guacamole~just buy it if you are crunched for time. You can even buy a fully cooked chicken at the market, come home and warm some tortillas and you are ready to go! It's just that easy!


Monday, July 5, 2010

Apricot Jam

~Apricot Jam~

Soon the dilemma of what to do with all these apricots will be over. These seasonal stone fruit with velvety skin and a soft, fleshy, sweet interior has kept me on my toes to make sure they don't go to waste. My solution now is to can some jam. I researched recipes and decided that a variation of David Liebovitz's would be best. There isn't much pectin in apricots so, I am using liquid fruit pectin to make sure the jam sets well.


~Finished Product~

7 cups fresh apricot chunky puree (I removed the skin by blanching the apricots in boiling water for a couple of minutes and dropping them into a cold water bath~the skin slides off~beware not to overcook though or you will have mush)
6 cups granulated sugar~ use more or less than this depending upon the sweetness of your fruit
7 tablespoons fresh lemon juice
1-3 ounce packet of liquid pectin~made by Ball
12-half pint canning jars

Note: you could make 1/2 or 1/4 of this recipe and store in the fridge if you don't want to do the full-on canning process. I did follow the USDA canning guidelines which can be found online.

1. Place the skinned apricots in the work bowl of a food processor. Pulse into a rough chop. Pour into a large stockpot or canning pot. Continue until all the apricots are chopped.

2. Add the remaining ingredients. Cover the pot and cook until the apricots come to a rolling boil. At this point make sure your heat is no higher than medium-high so the contents at the bottom of the pan do not burn. Stir occasionally. Cook, uncovered~skimming any foam that rises to the top to ensure the jam is clear. After a period of time, the jam will begin to thicken and reduce down. The color will darken, and when the jam is at 220, drop a dab of jam on a small plate and place in the freezer for a few minutes. Now check to see if your jam has thickened to the right consistency, if not continue to cook it until you have the results you are seeking. At this point, I added a split vanilla bean to my jam.

3. Remove from heat and package or store in containers. Follow USDA canning guidelines or place in containers to refrigerate.

~Every summer canning was a part of our family life. Peaches were probably our family favorite. It is always comforting to hear the ping from the jam jars as they cool, letting me know they are sealed properly. We use lots of apricot jam throughout the year. It makes a great base to dip egg rolls into. By just adding a small amount of Asian sesame oil and soy sauce to the apricot jam you have a lovely dipping sauce. A jar could also be reheated with finely diced jalapeno pepper and then cooled and poured over a block of cream cheese for a treat to eat with Wheat Thins or favorite crackers.~

Sunday, June 27, 2010

Apricot Tart

~Apricot Tart~

Our apricots are ripening very quickly!

We are bracing ourselves for our biggest crop ever!
Besides eating them right off the tree, we will be enjoying them in tarts, jam making, fruit and cheese boards, and tucked into salads.

Begin with a simple crust using purchased puff pastry. Place the tiniest amount of flour on a pastry board, roll out one sheet of puff pastry until it is large enough to cut around the bottom of your tart inset. Using the tart inset as a pattern cut out a circle of puff pastry and place it in the tart pan. Use the puff pastry leftovers to create a 1/2 inch border around the edge of the puff pastry. See picture below. Use a dab of cold water to adhere them. I just piece mine together, so I don't have to use another sheet of puff pastry. By placing the additional piece of puff pastry around the edge, it will prevent your tart filling from over-flowing.

Prick the bottom of the puff pastry to keep it from puffing unevenly or too high in the center. See example above. Now place it in the freezer until your filling is ready. Preheat oven to 400 degrees.

Prepare the custard filling

You will need:
20 medium apricots
1/3 Cup sugar
1 box puff pastry (you will use 1 sheet, thaw overnight in the refrigerator) put the 2nd sheet back in the freezer if you are not using it right away.

Custard:
2 eggs
1/3 cup AP (all purpose) flour
1/2 cup granulated sugar
1 cup cream
2 tablespoons vanilla or cognac (I love the flavor of cognac in custard)
pinch salt

In a medium mixing bowl, place all the custard ingredients. Whisk well to combine. Strain into a heavy saucepan such as the one below. Over medium-low heat, cook the custard until it is thick and will coat the back of a spoon and leave a track when you draw your finger across it. Remove from heat (at this point, I add 1 tablespoon butter, it is not necessary though). Place in a bowl to cool.

Prepare your apricots. Remove the pits and cut into quarters. Sprinkle with 1/3 cup sugar and set aside.


Remove puff pastry shell from freezer and spread with the custard mixture. Arrange the sugared apricots on top with their points sticking up. As pictured below. It gives the tart a rustic charm with the tips slightly charring as they bake.

Place the prepared tart on a baking sheet and bake in a 400 degree oven for 45 minutes.
Fresh from the oven!

I can hardly wait to bite into this! Apricots take on a tart flavor when baked. If you like sour candies, you will love the flavor of this tart. It's sweet and creamy with a flaky crust and a tinge of tart. What's not to love?

Sunday, June 13, 2010

Picnics

Among the delights of summer were picnics in the woods....

phot0: Country Living

~Heirloom Tomato & Truffle Cheese Panini Ingredients~

~Heirloom & Truffle Cheese Panini~

~Classic Fully Loaded Submarine Sandwich~

~Recipe for Heirloom Tomato & Truffle Cheese Panini~
1 loaf parbaked Demi Pain Rustique bread (Trader Joe's)
heirloom tomatoes (I used baby tomatoes~you could use the larger heirloom tomato variety, sliced)
Truffle Italian Cheese (Trader Joe's) or use your favorite cheese
1 small sweet onion, sliced very thin
baby lettuce
dried oregano, 1/4 to 1/2 teaspoon~to your taste
light olive oil mayonnaise
truffle oil, optional
olive oil
balsamic vineger
electric panini maker, grill pan or cast iron skillet

~To make~
1. Slice open the bread, lengthwise in 1/2, leaving one side attached.
2. Lightly spread with mayonnaise.
3. On one side of the bread place a layer of lettuce.
4. Top this with thinly sliced onion.
5. Add a thin layer of cheese, sliced.
6. Then add your tomatoes. If using heirloom cherry tomatoes, cut in half.
6. Sprinkle the tomatoes with 1/4 to 1/2 teaspoon dried oregano, a drizzle of truffle oil or olive oil, a drizzle of balsamic vinegar, then a dash of salt and pepper.
7. Press the top down on the sandwich. Lightly brush with olive oil or truffle oil.
8. Place on a preheated panini electric grill or on a hot cast iron skillet and top sandwich with a heavy heat safe object to press the sandwich down, turning the sandwich over to make sure both sides are toasted.
9. Toast to your liking. Remove. Let sit 5 minutes before slicing with a serrated knife.
Serve or wrap with foil to take to your picnic site!

~Recipe for Classic Sub~
1 Ciabatta loaf or french bread loaf.
1/2 red bell pepper, sliced into very thin rings.
1/2 sweet onion, sliced into very thin rings.
your favorite lettuce leaves (not iceberg)
sliced turkey
sliced ham
sliced provolone
pre-cooked bacon slices
1/4 cup light olive oil mayonaise
1 tablespoon, sweet pickle relish
1 teaspoon yellow mustard
1 teaspoon ketchup

~To Make~
1. Slice bread in 1/2 lengthwise leaving one side attached.
2. Toast bread under the broiler until light golden brown.
3. Remove bread from oven and turn the oven setting to 350 degrees. Set the bread aside.
4. Make sauce for bread by combining the mayo, mustard, ketchup & pickle relish together. Spread on the toasted cut sides of the bread.
5. Add a layer of lettuce.
6. Add bell pepper slices.
7. Add onion slices.
8. Add meats.
9. Add cheese.
10. Close the top. Place on foil. Slice, but keep whole, being careful not to cut through the foil. If you do, just add another layer of foil to seal. Place in oven for 10 minutes to warm a little.
11. Remove from oven, slice and serve, or if taking to a picnic, keep it wrapped until you serve it.

~Enjoy your excursion out of doors~take in the beauty of the landscape and the joy of partaking of a meal with those you love~


Tuesday, May 25, 2010

Some of Life's Simple Pleasures

Oven S'mores


photography by Kailey Smith

~3 basic ingredients~
Old School Marshmallows
Old School Hershey Bars
Old School Graham Crackers


Arrange graham crackers on a cookie sheet.
Top 1/2 of the graham crackers with marshmallows that you have cut in 1/2. Place the marshmallows side by side on one side of the graham cracker sandwiches. See above example, each graham cracker 1/2 has one side of the halved marshmallows on them. Leave the other half of the graham cracker blank until they are cooked, then you will add the chocolate. Now place the cookie sheet full of crackers in the oven to toast the marshmallows. Under the oven broiler (set rack in center of oven-not too close or they will burn) broil until the marshmallows are golden brown. This happens rather quickly. Remove from oven and place the Hershey's chocolate pieces on the blank graham pieces. Sandwich them together and place on a big platter. This is an easy way to serve a crowd! These are messy and will bring out the child in you as you try to lick the oozing melted chocolate to keep it from dripping all over.


Friday, May 14, 2010

Summertime And The Living Is Easy

Ah! The Summerhouse!
It's time to switch out the winter gear for warmer climes.


~Great Reads~


~Edisonesque Lighting~


~A great bed you can languish in~
picture from Country Living


~Then Followed that beautiful season...Summer...Filled was the air with a dreamy and magical light and the landscape as if new created in all the freshness of childhood ~Henry Wadsworth Longfellow~


Sunday, April 25, 2010

Grilled Tuna Salade Nicoise

~Ingredients~

~Ready to serve~


Grilled Tuna Salade Nicoise
~This is a great lunch or dinner salad, served hot or at room temperature~

Ingredients
1 head of romaine lettuce
2 hard boiled eggs
1/2 cup pitted Kalamata Olives, rough chopped
1 tuna steak per person (I used 6 medium sized portions), grilled

2 cloves garlic & 2 tablespoons olive oil for the cherry tomatoes

1 container cherry tomatoes, saute them in olive oil and 2 cloves minced garlic. Season with salt and pepper. They are done when the skins begin to burst. Remove from heat.

1 bundle fresh asparagus, steamed, seasoned with salt and pepper
12 baby potatoes, steamed-seasoned with salt and pepper
salt and pepper to season

Dressing: You may choose to buy a good Caesar dressing if you are on a time constraint.

Into the work bowl of a food processor place,
3 cloves garlic, peeled
1 tablespoon Dijon mustard (I use country style Dijon)
2 teaspoons sugar or honey
dash cayenne pepper
1/4 cup red wine vinegar
1/4 cup water
2 teaspoons Worcestershire sauce
juice of 1 lemon
1 full teaspoon anchovy paste
1 tablespoon mayonnaise (I use olive oil based mayo)
2 tablespoons Parmesan cheese
Combine all these ingredients and then:
add ~ 1 cup Canola oil~pour through the top feed tube of your food processor in a slow steady stream.

Compose all of the salad ingredients on a large platter. Drizzle with dressing. Serve remaining dressing on the side.

Serves 4 as a main course


Monday, April 12, 2010

One for You and One for Me!


(The Gathering of Friends Volume One (of 2 so far)
by Michelle Huxtable and Alyse Christensen

A great cookbook!
Tried and true recipes...just for you!

An adaptation of Ryan's Cookie-page 117
~White chocolate chips, dried cranberries and chunks of pecans~

1 cup brown sugar, packed
1 cup white granulated sugar
1 cup (2 sticks) butter, room temperature
2 eggs
1 1/2 teaspoons vanilla
2 cups flour
1/2 teaspoon salt
1 teaspoon baking powder
1 teaspoon baking soda
2 1/2 cups oatmeal
1- 11 ounce bag white chocolate chips
1 cup dried cranberries
1/2 cup pecans or walnuts, rough chopped (optional)

Preheat oven to 400 degrees.

Cream together white and brown sugars, butter, eggs, and vanilla.
In a separate bowl combine the flour, baking soda, baking powder and salt, stir with a whisk and blend into the creamed mixture.
Fold in the white chocolate chips, cranberries and nuts.

Drop by spoonfuls onto a parchment lined, Silpat lined or buttered cookie sheet. Bake for 8 minutes in a preheated oven. Watch that they don't get too dark. They should be barely golden brown when done.

Now go get you cold glass of milk and enjoy each lip smacking morsel.

Our hope is that this book will inspire the reader with ideas of how to enhance relationships, establish traditions and celebrate life.~Michelle Huxtable & Alyse Christensen. (You may find their book online -The Gathering of Friends-or at gift shops around the country)


Wednesday, March 18, 2009

Spring/Summer Accesories


Add a little style to your spring and summer dresses, especially if they are long cotton ones, with smashing accessories.
This differentiates you from everyone else and says you have chic style.
Here is one way, although there are many.....

Simple dress, sandals and.....tons of bangles.
We put this look together at Forever 21 for the mere price of $20.00 and we mixed them all up (this was 4 seperate bracelets)! We think that you shouldn't spend too much money on trendy jewelry, so look at places like Forever 21 and H&M. Then spend the most on your shoes (because cheap shoes are a dead giveaway).
The season trend is statement jewelry but don't get a fashion ticket by violating this law by wearing all of them at once.
If you are going to wear bangles don't wear a ring on the same hand and skip a necklace and earrings (unless they are very simple).
Or wear a Statement necklace alone or just earrings and a ring....you get the idea.

"Being Stylish takes time, patience and above all practice. Gore Vidal said, " Style is knowing who you are, what you want to say and not giving a Damn".