Splendid Delights to Sink Your Teeth Into

We are led by our passions for all things born of the past and found in the present.

Tuesday, June 29, 2010

Planning a Wedding

Princess Grace and Prince Rainier


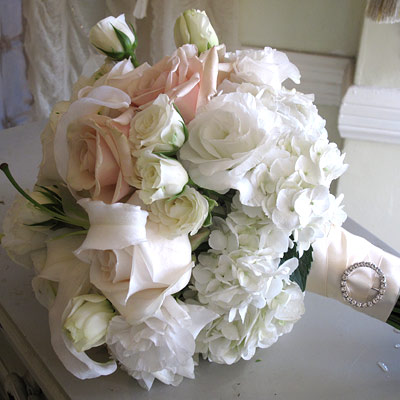
As a past wedding director & coordinator, I wanted to share some tips for would-be brides (and grooms) planning to marry.
When you begin your journey to marry, set a budget and a realistic date to meet that budget. This is especially important if you don't already have savings or parents to help you pay for it. You won't have to cut corners this way.
Realize that the planning and details can at times be stressful. To avoid that as much as possible, have all your plans in a wedding binder with a check off list of all the wedding details and a timeline. Make sure you are finished with everything at least one month before your wedding so you can relax and get ready for the most wonderful day together. Doing everything last minute is a disaster.
The focus of your wedding is you as a couple. It is not pageantry! (I can't say enough about how the media has created an unrealistic appetite for couples to have over-the-top weddings~save that for the celebrities)!
Don't forget to consider the comforts of your guests. The elderly are sensitive to heat and standing in long lines. Make sure you have adequate coverage and seating.
Your wedding does not have to be extravagant. You can have a wedding on any budget! Incorporate you into all the details~don't try to pattern yourself after anyone else. The colors you choose and the decor should be recognized as your special touch. There are lots of wedding blogs for inspiration.
Realize that weddings rarely go off without a hitch! The day of your wedding, things will unfold as they will~you will not be able to control everything! Go with the flow and know that those around you want only the best for you.
Determine what you want your wedding day to be like. For instance, if you are thinking about your soon to be spouse, thankful for all the support of your family and friends, willing your day to be beautiful, it will. Be positive! You will remember this special day for years to come as you grow old together.


Sunday, June 27, 2010

Summer Guests

~Make your guests feel like they are at home~

Summer Guests

I was recently the guest at someone's home, and I had such a wonderful visit. The key was really simple: I felt welcomed and my host anticipated the way I wanted to be greeted and treated. I have several sisters who are generous in spirit and amazing hostesses. It's always a pleasure to be their guest!

Here are my tips for being the hostess-with-the- mostess:

~Give the room a personal feel~not the feeling of a hotel.
~Make your guests feel comfortable by being yourself.
~Make sure their sleeping arrangements are comfortable. Clean bedding and a clean room.
~Use a neutral air freshener, some people are allergic to fragrances.
~Make sure they have a place to hang their clothes.
~Have an iron handy just in case they need to refresh their clothing from being folded in a suitcase.
~Make sure you have a set of fresh towels for them to use in the bathroom.
~Keep beauty samples from makeup counters at department stores in a little basket for their toilette.
~See if they need a hair dryer or flat iron.
~Make sure they have water by their bed in case they are thirsty during the night.
~Have a good idea of what they like to eat, they might be a vegetarian or on a special diet.
~Have a night light available just in case they need to get up during the night.

For that extra touch:
~Put fresh flowers in their room~if the person does not have allergies.
~Have a notepad and pen in their room.
~A basket of fresh fruit and snacks.
~Good magazines and good books.
~A reading light.
~A lightly scented candle.


Now you can enjoy your guests this summer~

Crown & Crumpet

~Crown & Crumpet, Ghirardelli Square
San Francisco~
900 N. Point Street
(415) 771-4252

~cheeky gifts~


~No stuffy Victorian fare here!~
This establishment is a riot of color and whimsy. The brainchild of proprietors, Amy & Christopher Dean. She a yank who studied in Britain, ended up in London in the antiques trade and eventually for Ralph Lauren & movie sets-he a proper English gent who also was in the antiques trade-they married and decided to start a business here in the U.S. and we are soooo glad they did! All of the fabrics used at Crown & Crumpet are from Cath Kidston. There is so much to see, it will take numerous visits to take it all in. They describe the experience there as, "A room with tea and wit". This was a wonderful experience and not to be missed if you are in the bay area any time soon.

~There are plenty of choices, we tried them all!~
The fairy cakes were a must!
Even the shades are embellished!

Queenly places to sit!

Apricot Tart

~Apricot Tart~

Our apricots are ripening very quickly!

We are bracing ourselves for our biggest crop ever!
Besides eating them right off the tree, we will be enjoying them in tarts, jam making, fruit and cheese boards, and tucked into salads.

Begin with a simple crust using purchased puff pastry. Place the tiniest amount of flour on a pastry board, roll out one sheet of puff pastry until it is large enough to cut around the bottom of your tart inset. Using the tart inset as a pattern cut out a circle of puff pastry and place it in the tart pan. Use the puff pastry leftovers to create a 1/2 inch border around the edge of the puff pastry. See picture below. Use a dab of cold water to adhere them. I just piece mine together, so I don't have to use another sheet of puff pastry. By placing the additional piece of puff pastry around the edge, it will prevent your tart filling from over-flowing.

Prick the bottom of the puff pastry to keep it from puffing unevenly or too high in the center. See example above. Now place it in the freezer until your filling is ready. Preheat oven to 400 degrees.

Prepare the custard filling

You will need:
20 medium apricots
1/3 Cup sugar
1 box puff pastry (you will use 1 sheet, thaw overnight in the refrigerator) put the 2nd sheet back in the freezer if you are not using it right away.

Custard:
2 eggs
1/3 cup AP (all purpose) flour
1/2 cup granulated sugar
1 cup cream
2 tablespoons vanilla or cognac (I love the flavor of cognac in custard)
pinch salt

In a medium mixing bowl, place all the custard ingredients. Whisk well to combine. Strain into a heavy saucepan such as the one below. Over medium-low heat, cook the custard until it is thick and will coat the back of a spoon and leave a track when you draw your finger across it. Remove from heat (at this point, I add 1 tablespoon butter, it is not necessary though). Place in a bowl to cool.

Prepare your apricots. Remove the pits and cut into quarters. Sprinkle with 1/3 cup sugar and set aside.


Remove puff pastry shell from freezer and spread with the custard mixture. Arrange the sugared apricots on top with their points sticking up. As pictured below. It gives the tart a rustic charm with the tips slightly charring as they bake.

Place the prepared tart on a baking sheet and bake in a 400 degree oven for 45 minutes.
Fresh from the oven!

I can hardly wait to bite into this! Apricots take on a tart flavor when baked. If you like sour candies, you will love the flavor of this tart. It's sweet and creamy with a flaky crust and a tinge of tart. What's not to love?

Saturday, June 19, 2010

Sugar & Cinnamon Krispies


~Simply Delightful Morsels for Coffee or Tea~
Recipe:
8 slices white bread, crusts removed and sliced in half to form a triangle.
6 tablespoons butter, melted
1/2 cup granulated sugar
2 tablespoons ground cinnamon

Directions:
Preheat oven to 325 degrees. Line a cookie sheet with parchment or use a Silpat.
Mix the sugar and cinnamon together. For an additional flavor boost, use vanilla sugar-made by storing a vanilla bean in several cups of sugar for a few days.
Brush the bread triangles with melted butter. Lightly dredge them in the cinnamon-sugar mixture. Place each sugared bread on a prepared cookie sheet.
Place in 325 degrees oven for 10 minutes. Remove the Krispies from the oven, turn them oven and bake for 10 more minutes. Remove from oven and eat right away or store in an airtight container. These are delicious dipped in coffee or tea!

As small children living in Iowa, we were frequently served a variation of this recipe from our mom's farm kitchen - it might be just one side of the bread buttered and sprinkled with cinnamon sugar and broiled in the oven to delicious perfection. She could make wonderful treats using bread as a base~brown sugar & butter sandwiches or radishes & salt on buttered bread or tomatoes, salt & mayo sandwiches or sliced cucumber sprinkled with salt on buttered bread. These were frequent offerings in the summer when the our garden was at it's peak of production. She found the most creative ways to use everything!

This recipe was inspired from a similar one found on Orangette Blog.

Thursday, June 17, 2010

A Perfect Dozen

(picture~unknown source~)
~Patisserie Amore~
Qu'ils mangent de la brioche
(Let Them Eat Cake)


Sunday, June 13, 2010

Picnics

Among the delights of summer were picnics in the woods....

phot0: Country Living

~Heirloom Tomato & Truffle Cheese Panini Ingredients~

~Heirloom & Truffle Cheese Panini~

~Classic Fully Loaded Submarine Sandwich~

~Recipe for Heirloom Tomato & Truffle Cheese Panini~
1 loaf parbaked Demi Pain Rustique bread (Trader Joe's)
heirloom tomatoes (I used baby tomatoes~you could use the larger heirloom tomato variety, sliced)
Truffle Italian Cheese (Trader Joe's) or use your favorite cheese
1 small sweet onion, sliced very thin
baby lettuce
dried oregano, 1/4 to 1/2 teaspoon~to your taste
light olive oil mayonnaise
truffle oil, optional
olive oil
balsamic vineger
electric panini maker, grill pan or cast iron skillet

~To make~
1. Slice open the bread, lengthwise in 1/2, leaving one side attached.
2. Lightly spread with mayonnaise.
3. On one side of the bread place a layer of lettuce.
4. Top this with thinly sliced onion.
5. Add a thin layer of cheese, sliced.
6. Then add your tomatoes. If using heirloom cherry tomatoes, cut in half.
6. Sprinkle the tomatoes with 1/4 to 1/2 teaspoon dried oregano, a drizzle of truffle oil or olive oil, a drizzle of balsamic vinegar, then a dash of salt and pepper.
7. Press the top down on the sandwich. Lightly brush with olive oil or truffle oil.
8. Place on a preheated panini electric grill or on a hot cast iron skillet and top sandwich with a heavy heat safe object to press the sandwich down, turning the sandwich over to make sure both sides are toasted.
9. Toast to your liking. Remove. Let sit 5 minutes before slicing with a serrated knife.
Serve or wrap with foil to take to your picnic site!

~Recipe for Classic Sub~
1 Ciabatta loaf or french bread loaf.
1/2 red bell pepper, sliced into very thin rings.
1/2 sweet onion, sliced into very thin rings.
your favorite lettuce leaves (not iceberg)
sliced turkey
sliced ham
sliced provolone
pre-cooked bacon slices
1/4 cup light olive oil mayonaise
1 tablespoon, sweet pickle relish
1 teaspoon yellow mustard
1 teaspoon ketchup

~To Make~
1. Slice bread in 1/2 lengthwise leaving one side attached.
2. Toast bread under the broiler until light golden brown.
3. Remove bread from oven and turn the oven setting to 350 degrees. Set the bread aside.
4. Make sauce for bread by combining the mayo, mustard, ketchup & pickle relish together. Spread on the toasted cut sides of the bread.
5. Add a layer of lettuce.
6. Add bell pepper slices.
7. Add onion slices.
8. Add meats.
9. Add cheese.
10. Close the top. Place on foil. Slice, but keep whole, being careful not to cut through the foil. If you do, just add another layer of foil to seal. Place in oven for 10 minutes to warm a little.
11. Remove from oven, slice and serve, or if taking to a picnic, keep it wrapped until you serve it.

~Enjoy your excursion out of doors~take in the beauty of the landscape and the joy of partaking of a meal with those you love~


Saturday, June 5, 2010

Peach Pancakes for Fathers Day


Phyllis B's Famous Peach Pancakes
aka. Mom, Gram, Sister, #44
~She will always be remembered for her famous peach pancakes.~


~List of Ingredients~
6 Ripe Peaches
1 cup granulated sugar
1 cup water
2 tablespoons cornstarch
1 teaspoon vanilla
1 can whipped cream (the point and spray kind)

Fill a large saucepan with water and bring to a boil. Reduce the heat to medium and carefully drop in the fresh peaches. Let them sit in the hot water for 2-3 minutes. Test one of the peaches by dropping it in a cold water bath~making sure the skin slips easily from the peach. Remove the remaining peaches if they are ready to skin. (don't overcook~this will just take a couple of minutes) dropping them in a cold water bath. Remove the skin and slice each peach into bite sized slices. If any juice lands on your cutting board, add that to the peaches. As you are cutting up the peaches, place them in a large saucepan. Add 1/2 cup of the water to the peaches, and with the other 1/2 cup water, add 2 tablespoons corn starch and mix well~set cornstarch mixture aside. Add 1 cup sugar (less or more depending on peach ripeness) to the peaches. Place the pan full of peaches on the stove over medium heat. The peaches will release some of their juices as they cook. Cook on medium to medium high for 4-5 minutes. Remove the pan of peaches from the heat source and stir in the cornstarch mixture~being careful not to break up the peach slices if you can. Place the peaches back on the stove and gently stir 2-3 minutes longer until the juices begin to thicken to a syrup consistency. Remove from heat and add the vanilla and place the peach topping in a serving bowl.

Now whip up a batch of your favorite pancakes.

Top with warm peaches.

Top peaches with a fluffy mound of whipped cream.

Serve to raves!

As an homage to the famous Phyllis B, I cooked these pancakes in her cast iron skillet just as she had when we were little. Then when she was able to purchase an electric griddle, she would make scores of pancakes at one time.