Splendid Delights to Sink Your Teeth Into

We are led by our passions for all things born of the past and found in the present.
Showing posts with label COOKING. Show all posts

Sunday, April 3, 2011

Ladies Who Lunch

Maybe those southern belles were onto something...lunch with the ladies...bridge games...gossip...giggles and above all a hat and gloves. Very demure! We are posting a light lunch recipe...perfect for having some girlfriends over. 


Pictured are some of the ingredients we used for this demo.
We are making lettuce/herb bundles, Thyme-Lemon Vinaigrette, Pesto/Mascarpone Cigars and Toasted Camembert Cheese for our luncheon. 


Thyme-Lemon Vinaigrette

Ingredients:

Juice of 1 lemon
1/4 teaspoon lemon zest from the rind (careful not to get into the white part of the skin--bitter)
1 teaspoon fresh thyme leaves
1/3 cup extra virgin olive oil
salt and pepper to taste--it won't take much

Combine ingredients in a mason jar, place the lid on tightly and shake away. Now your done with the dressing-set it aside 


Phyllo Dough aka Filo Dough

We used these "pesto/mascarpone cigars" as a garnish for our salad. You could make a cigar bar if you used this recipe for a party. Would be fun! We love fun food!

Ingredients:


6 ounces mascarpone cream or cream cheese room temperature very important for the spreadability factor when you make the cigars. 
1/2 cup grated Parmesan Cheese
1 green onion or scallion
1/8 cup pre-made pesto (you can get this at most markets)
1 box phyllo dough, you will find this in the frozen section of your market-thaw in the fridge overnight. Do not attempt to use phyllo dough frozen...it will crack. 
1 stick melted butter

In the work bowl of a food processor, add all the above ingredients. Pulse until this mixture is blended, but still a little bit chunky. See below. Set aside until your phyllo dough is prepped. Don't refrigerate unless you are doing the next step another day. In that case make sure the pesto/cream mixture is at room temperature. 


The funky picture below is an illustration of how we made the phyllo dough cigar bar holder. The shape was made by rolling aluminum foil into cylinders to create forms. Just remember to gently remove the foil right after it comes out of the oven and it is still malleable for removal. We scattered grated Parmesan cheese and salt and pepper over the surface. 


There are some rules for using phyllo dough. It dries out very quickly, but once you have lightly covered the surface with melted butter or olive oil, it becomes pliable. You must keep the unused dough covered and protected from air or it will dry out and crack. Caution if the damp towel you have covering the unused dough is too wet, it will act as glue and stick all the sheets together...it will become unusable. 

To begin, remove unwrap and unroll the thawed phyllo dough. You will remove 1 sheet of dough at a time and work very quickly. Remember cover the unused dough. Have 1 stick of melted butter and a pastry brush ready to go. 

Make sure your work surface is large enough to lay 1 sheet of filo dough out flat at a time. Gently lift 1 piece off the top of the dough. Cover the remainder with the ever so lightly dampened towel. Place the first sheet down on your work surface~lightly brush 1/2 of the surface with melted butter (go easy with the butter/it just takes a dab) and fold in half. Spread more melted butter on the newly folded surface. Using a spatula, quickly and lightly spread some of the pesto/cream mixture all over the surface. Cut the pesto covered sheet in 1/2  and roll each piece into a cigar. Brush each cigar with a little butter and cut into 1/2 again. Each sheet of phyllo dough will make 4 cigars. Repeat. Bake in a preheated 375 degree oven for 10-12 minutes on a Silpat or parchment lined cookie sheet. If the cigars are not brown yet, return cigars to the oven for a few more minutes. They should be lightly golden brown.


Just before serving lunch, remove the wrapper from the room temperature Camembert cheese and return it to the bottom of the wooden box it came in. Score the top with a sharp knife as in the photo above to make 8 sections. Add 1 clove (not head) of crushed garlic to 1/4 cup olive oil. Brush the top of the cheese with this mixture and then top the cheese with black pepper and salt. (you can do this part ahead of time and just have it ready to go) Place under the broiler of your oven. Leave the door cracked and don't leave it's side--that would be a disaster waiting to happen. In a few minutes the cheese will be browned and bubbly. Place the cheese in the center of your composed salad bundles and serve right away. 

Composed salad bundles were made from alternating a handful of red leaf and green leaf baby lettuces into a posy of sorts with a sprig or two of herb garnish such as parsley, dill, etc. Each bundle was tied with a long strand pulled apart from a green onion top. Tie loosely, you won't need to tie a knot. We did this ahead of time and placed them all on a tray covered with damp paper towel and plastic wrap to keep them fresh in the fridge. Assemble everything just before serving and drop the cheese right in the middle. 


Have fun with this...remember it's all in the planning and details. These are not difficult recipes with the exception of getting the hang of how to use phyllo dough. Now who do you want to have over?

The inspiration for this segment came from viewing cook your dream. Though we have posted recipes before using this cooking method for cheeses such as feta, we were reminded of just how fun it is to serve cheese this way.

Sunday, March 13, 2011

Health in a Bowl

One of our favorite breakfast selections at Corner Bakery is their Swiss Oatmeal. After a satisfying bowl,   we don't feel bogged down, our mind is clear and most importantly we feel like we have consumed good, clean-food. Here is our copycat recipe:


For 2 servings
1 6 ounce container fat free vanilla yogurt (we used Cascade Farms fruit sweetened). 
1/2 cup quick cook Irish Oats
1/2 cup soy milk, plus extra to use before serving
1/2 teaspoon real vanilla extract
2 tablespoons dried currants (or you could chop up raisins)
2 tablespoons dried cranberries
2 tablespoons toasted sliced almonds
2 tablespoons chopped green apple skin-on
2 tablespoons chopped banana
(you can make this what you want-we just stuck to the original CB recipe)

The night before:

In a medium bowl, add the vanilla yogurt, vanilla, dried currants, and 1/2 cup soy milk. Stir to combine - then add the oatmeal. Stir again, cover w/plastic wrap and place in the refrigerator overnight. 

Before serving the next day add a couple of tablespoons soy milk to the oatmeal mixture and stir. It should look like thick pudding. Add the cranberries, banana, and apple. Mix in.

Place in 2 serving bowls. Top with toasted almonds. You may want to garnish as we did in the photo below. We like the natural sweetness of the fruit, but you may want to drizzle some honey on top if you like a lot of sweet. This recipe is served cold-uncooked.


You know we are crazy about taking the best care of ourselves that we can. We mix it up a little on the weekends, but we can afford to because our normal regime observes a healthy lifestyle.

Live a life that is well spent! Not tomorrow...today? Why not! Take care of your beautiful self!

This Swiss oatmeal is loosely based on Muesli, the popular European breakfast cereal. It's raw and chock full of whole grains, nuts, seeds, and fruits. The originator was a Swiss physician, Maximilian Bircher-Benner in 1900. He created it for his ailing patients with great success. Sound familiar? That's how our breakfast cereals came into being too. We've veered a little away from that concept though here in America. Muesli and Swiss oatmeal are full of complex carbs, fiber, fresh or dried fruit, yogurt/dairy, seeds and nuts, all having heart healthy benefits. It's a choice, your choice, choose wisely, eat wisely, my loves.

Friday, February 18, 2011

Roasted Heirloom Carrot Soup

Our guest is motoring down for the holiday weekend...it's raining cats and dogs...a roaring fireplace and a cup of hot Heirloom Carrot Soup w/Parmesan Croutons awaits them. It's easy to whip up a creamy vegetable soup, but we are continuing down the coast with them for a holiday weekend sooo.... we'll post this recipe when we return...
Happy Holiday!


Toss carrots, onions, celery, garlic and sage with Olive oil and salt and pepper. Sometimes simple things are the best 


Garnished w/Apple Smoked Bacon Bits, Creme Fraiche, and Parmesan Crouton.

Saturday, December 25, 2010

Christmas Breakfast

Misshapen, rustic, heavenly, Christmas Breakfast Cinnamon Rolls. These are worth the little bit of time it takes to make them. We only make these once a year at Christmas. It's just too hard to work off the extra pounds, it will be lots of veggies and clean eating beginning tomorrow! Beware these cinnamon rolls are really delicious with their light ethereal texture and cream cheese frosting. Just luscious!

Here's the recipe: (makes 2 round cake pans~ each pan serves 6-8)

The Dough Ingredients

2 packets active dry yeast (1/4 ounce each packet)
1/4 cup warm water (between 110 and 115 degrees)
1 1/2 cups warm evaporated milk
1 stick butter-or 1/2 cup, softened (you will need butter to grease the pans too)
1/4 cup granulated sugar
3 large eggs
6 cups all purpose unbleached flour

To begin~

1. In a small bowl, place the warm water and 2 packets yeast. It will get foamy in a few minutes, meanwhile go on to the next step.
2. Put a 2 cup measuring full of water in the microwave and heat for 5 minutes. This is where your dough will rise.
3. In the work bowl of a stand mixer, add the 3 eggs, warm evaporated milk, butter, sugar, and salt. Mix until the ingredients are combined.
4. Add the foamy yeast scraping out all the bits that cling to the bowl.
5. Add the 6 cups flour. Mix for 3-4 minutes or until the dough is smooth.
6. Scrape the very soft dough into a pre-oiled large bowl (use canola). Cover with plastic wrap and place in the pre-warmed microwave. Note: Do not turn the microwave on with the dough in it, this is just a warm place to allow the dough to rise.
**It will take 1 1/2 hours for the dough to rise.

7. Prep for next step. Make a cinnamon filling:

6 tablespoons granulated sugar
6 packed tablespoons brown sugar
1 stick softened butter
5 teaspoons ground cinnamon
canola oil

1. Spread 3 tablespoons canola oil over the inside surface of a jelly roll/cookie sheet with edges.
2. Punch down the risen dough, and place 1/2 of the dough on the oiled cookie sheet.
3. Using your finger tips, press the dough over the surface of the pan, like you would pizza dough. It will relax and hold it's shape as you go. (the very edges may pull in, that's okay)
4. When the dough is pressed over the surface of the pan, then spread the surface with 2-3 tablespoons very soft butter.
5. Sprinkle the buttered dough with cinnamon sugar.
6. Beginning at the bottom corner of the dough lengthwise, gently roll the dough~go from one side across and continue moving up until you have a long roll.
7. Gently cut into 2 inch pieces with a sharp knife.
8. Place in buttered cake pans, I use high sided 9 inch cake pans.
9. Cover with plastic and begin the rising process same as before in the microwave.
In one hour, pre-heat your over to 350 degrees. Your cinnamon rolls will be ready to bake, remove the plastic and bake for 35 minutes.
Remove from oven to cool!

Cream Cheese Frosting.

6 tablespoons butter, softened room temperature butter
1 teaspoon vanilla
1 small 3 ounce cream cheese, softened to room temperature
2 cups powdered sugar
2 tablespoons milk ~ you may need more or less

To begin:

Place all the above ingredients in the bowl of a food processor or mixer. Combine until creamy. Spread over the top of the warm cinnamon rolls.
Serve

Monday, December 6, 2010

Sugar Cookies

Every single Christmas for all of our life, we have had a batch of these cookies. They go back generations and generations, rooted in our German ancestry. Grandma Mathilda made them for me, and her mother made them for her and my mom made them for our children and so on. My Grandma was an amazing cook, a real Renaissance woman~she made just about everything whether to eat or wear or adorn a home. Every year at Christmas time a big box would arrive from the post office. All of the contents would be packed in popped popcorn. There were these sugar cookies, fudge, penuche, divinity, something gingery, etc. A real eye-popping assortment. Now mind you I struggled to do 2 batches over the weekend and I was exhausted. How did grandma do it??? I was in a hurry to get these off to siblings who live a distance, otherwise it works best to cut out and bake these cookies over a weekend, freeze them, and frost the following weekend.

~The finished product~
~The Sugar Fairy would surely approve~

~Some of the items you will need~

~German Sugar Cookies~

1/2 Cup vegetable shortening (we found some trans fat free at Whole Foods)
1 stick butter (1/2 cup) room temperature
1 cup granulated sugar
2 large eggs
4 tablespoons milk
2 teaspoons baking powder
1 teaspoon baking soda
1/2 teaspoon salt
3 cups all purpose unbleached flour
1 teaspoon real vanilla
{we don't add this, but Grandma Mathilda did~ 1 1/2 teaspoons anise seed}

To Begin:
In a large mixer bowl, add the vegetable shortening, butter, and sugar- beat until creamy. Add the eggs and continue beating until well combined. Add the vanilla. Add the dry ingredients flour, baking soda, baking powder and salt. Mix just until it comes together~and is fully mixed. Don't overdo it. Cut in half and form into a disk. This is a soft dough. It is meant to be rolled out with lots of flour. Wrap each disk in plastic wrap and place in the fridge to get cold. (1/2 to 1 hour)

To roll out:
Preheat oven to 350 degrees. You will need 2 cookie sheets, something to line the sheets with,i.e. parchment, silpat, etc., a flat surface to roll cookies out on, flour, cookie cutters, rolling pin spatula, bench scraper and pot holders.

Add some flour to the surface you are rolling your cookies out on. Cut 1/2 of the disk off. Lay the dough on the floured surface and flip it over so that both sides are floured. Flour your rolling pin. Roll the dough out 3/16 inch thick. Dip cookie cutters in flour and cut out shapes and transfer them to your prepared cookie sheets. Leave about one inch space between cookies. Place in preheated oven and bake for 10 minutes. Make sure your rack is centered in your oven.

Remove baked cookies from oven and place aside to cool. Meanwhile, have your next batch ready to go into the oven.

How did Grandma do this with a wood burning stove??

Have all your baked cookies ready, a spreader spatula, cookie sprinkles and bits and goodies, food coloring. We collect all sorts of sugars, sprinkles, non pariels, silver and pearl balls, etc., not to mention all the cookie cutters we have collected old and new. This year we found some gorg silver and gold sprinkles at Williams Sonoma. They really dress up the cookies.

To Frost:
(Grandma used 7 minute icing) Mine is a lot easier!
1 box powdered sugar (1 pound)
3 tablespoons meringue powder (See pictured above. Purchase at Joann's or Michael's in the bakery section)
6 tablespoons warm water

Beat all ingredients until icing forms peaks (7-10 minutes at low speed). Working quickly, place some of the frosting in small bowls to color or keep white. Frost and sprinkle each cookie as you go. Teamwork is best, grab some extra hands. Let the cookies dry a couple of hours and then package them up.

A few of our tree cookie cutters were used here.

~pearl sprinkles and snowy sprinkles~

Silver sprinkles and agey blue frosting, Tiffany blue with matching sugar and peachy-pink stars.

The packages of cookies are in the mail, going to some special homes. These cookies are even better after a few days, they taste like Christmas to us.

Saturday, November 13, 2010

Thanksgiving Menu

Herb Buttered Roasted Free Range Heritage Turkey
French Chestnut Heirloom Stuffing (the basic part of this recipe goes back many generations in the south)
Buttermilk Chive Yukon Gold Mashed Potatoes
Turkey Gravy
Triple Cranberry Conserve
Roasted Vegetable Platter
(Heirloom Carrots & Thyme, Haricot Vert with Smoky Niman Ranch Bacon, Baby Broccoli with Red Bell Pepper, Leaves of Brussels Sprouts with Date Vinaigrette)
Classic Maple-Brown Sugar Sweet Potatoes with Toasted Marshmallow Topping
1950's Scalloped Corn (been a part of our families Thanksgiving since we were little)
Homemade Yeasty Dinner Rolls with Creamery Butter

Dessert
Caramel Pumpkin Pie
Warm Apple, Pear, Cranberry Crisp and Vanilla Ice Cream
Pumpkin Cheesecake with Marshmallow-Sour Cream Topping & Gingersnap Crust
Jen's Famous Cookies

Our Thanksgiving will be an all day affair. We are taking some time at noon to deliver food to a local church that is feeding those in the community most affected by the economic downturn. Then back home to serve our meal. We eat and then we eat some of the leftovers later. We will be posting our recipes all week. Michael Symon, one of the Iron Chefs made a statement recently, he said, "I can teach you a recipe and you will have learned that recipe, but I can teach you technique and then you can make hundreds of recipes."

Our goal this week is to give you the techniques that will give you the results you need to ensure your efforts do not go un-rewarded. Let's face it, Thanksgiving is a labor of love, (even with the best laid plans) so let guests bring some of the side dishes or desserts, or buy some of it pre-made. Plan, write up your menu. Make a list of all the things you will need at the store and don't forget things like foil, or extra paper towels, etc. We even plan to have extra fresh bread on hand for turkey sandwiches later. Next clean out your fridge and food pantry. This way you will know what you have, what you need, and plenty of space to store the big items like the turkey. Tomorrow, we will pull out all our dishes, utensils, napkins and serving pieces and make sure they are refreshed and ready to go. When we hit next weekend, we just want to shop and get our home ready.

The best way to look at this ~ is to think of Thanksgiving conceptually. You are putting together all the parts that create a loving environment that allows our guests to reflect on the joys of being with family and friends, for the guests at our table to feel special and included; to look back on this past year and give thanks. Surround those you have in your home with a sense of appreciation. It is an honor to create all of the components that allow others to walk into our home and feel the warmth of togetherness and belonging.

Tomorrow we will post our French Chestnut Heirloom Stuffing Recipe.

Sunday, October 17, 2010

Hot Soup on a Cold Day!

It's been a cool, drizzly day today! A great day for soup! We are pulling out our staple creamy vegetable soup. It's nutrient rich---so good for you soup, and the plus is it tastes great too! We made a trip to the market for all the essential ingredients. Here they are pictured below.


This is what you need to make it:

1 quart chicken or vegetable stock (you will find this in the soup section of your market)
1 yellow onion, peeled and rough chopped
2 leeks, remove the dark green stems-split them in half and rinse out all the grit, then rough shop
2 carrots, peeled and rough shopped
1 bunch kale, wash and remove spine
3 stems celery, smaller inner stalks with leaves, rough chopped
2 tomatoes, rough chopped
2 broccoli heads, break into florets
2 handfuls baby spinach
2-3 medium potatoes, peeled and rough chopped
2-3 garlic cloves, peeled and sliced
2 tablespoons olive oil
1/2 teaspoon thyme or 5 sprigs fresh thyme
salt to taste
1/2 teaspoon pepper
2 dashes cayenne pepper
1/2 cup cream (optional)


Now take a large pot-like you would use to make spaghetti in--bigger than a saucepan. Turn the heat on to medium. When pan is hot add the olive oil, onions and leeks. When they are softened, but not browned, add the rest of the vegetables except the spinach- (that gets added at the end) now pour the stock over the vegetables. Put a lid on the soup as it cooks. It will take about an hour for the vegetables to become fork tender. Remove from heat, add the spinach, and use an emulsion tool blender, regular blender or cuisinart to blend the soup ingredients to a lovely creamy consistency. Add cream (if desired) and blend. Adjust seasoning. You may need a little more salt-careful not to overdo it.


You are ready to serve! You can add a dollop of creme fraiche or sour cream to garnish.

As a garnish we used crisp kale, creme fraiche, a toasted garlic sliver and a sprig of fresh thyme. This soup will warm you to the bone!

Wednesday, October 13, 2010

Tartine, San Francisco, California

One weekend several years ago we drove feverishly through San Francisco trying to find Tartine Bakery. We never could find it! We gave up and moved on to the next place on our list of places to visit. It haunted us that this great bakery could be so hard to find. Last week, one of our "foodie" coworkers dropped off a Tartine postcard and announced everything they had was "devine".

So we post to those of you who read our blog and live close to the Bay Area, please go and try Tartine. There are 2 locations. 600 Guerrero St at 18th, and 561 Valencia Street in San Francisco. Elisabeth Prueitt and her husband, Chad Robertson are the proprietors. They are well travelled and both trained at the Culinary Institute of America in New York. They bake their rustic breads in a wood fired brick oven. They have lots of accolades and are found in the "Best Of" San Francisco. We have their first cookbook and intend to put it to good use until our next visit up north.

Most products are organic, meats come from Niman Ranch, the coffee is organic, from Four Barrel, and most dairy comes from Straus Family Creamery, which is huge in the food movement in the Bay Area.
~Look at the lovely rustic crust on these slices of country bread~
~The crumb is just right and this bread appears to be studded with nuts~

~Elisabeth is an award winning pastry chef~

~Elisabeth and Chad~


~Views of Bar Tartine~
561 Valencia Street
San Francisco, CA 94110
(415) 487-1600


Friday, September 17, 2010

End of Summer Pasta

A quick and easy dish to serve on the side or as a main dish.
Cardiologists are telling us the best diet for maintaining a healthy heart is the Mediterranean Diet. Studies have been done on the benefits of portion controlled foods found most prevalent in the geographic areas known as the Mediterranean. Fish, olives and olive oil, nuts, fresh fruits and vegetables, and wine are laden with things that are good for our hearts. Here is a simple recipe:

Whole grain pasta, follow the package instructions to prepare (we used fettuccine)
1 handful baby heirloom tomatoes per person
3 cloves garlic, peeled and finely minced or crushed
1/3 cup fresh basil, julienned
sea salt (we used French fleur de sel)
Olive oil
Grated Parmesan cheese

To Prepare:

Heat a large saute pan on medium high heat and to the hot pan add 3-4 tablespoons olive oil. Add the garlic and stir into the oil (don't take too long-you don't want the garlic to burn). Add the tomatoes and saute at a high heat for about 4-5 minutes until the tomatoes just begin to crack and soften. Add salt to taste and basil.

Serve over cooked pasta. Sprinkle with grated Parmesan. It's just that easy! This is a very clean, healthy way to eat.

Look at all the plump goodness, ready to serve over pasta.

Now grab a glass of wine and just know you are taking good care of the ole ticker.

Sunday, September 12, 2010

Sunday Morning in WestlakeVillage

Sundays are one of two days we have Farmers Markets in our area. Growers from all over the Southern California area bring their best from the ground right to our tables. One of our favorites finds is the Thomcord grape. A cross between Thompson seedless and the Concord grape. There are no seeds, the globes are sweet and pale plum in color. Menu ideas happen right on the spot as we eye an unusual item or the arrival of the next wave of seasonal goods.


You may even find plants such as these quaint baskets of living salad greens.

A local French family sells their delectable goods there too.


Isn't this just the way you want to buy your French bread?
Claudine and her grandfather are so charming.

We popped across the street to Gelson's. We haven't shopped there much since cooking school days. (The cooking school is located on the backside of this store.) Why haven't we been shopping here? Because we followed the newest store in town and then the next and so on and got way off the beaten path.

Wolf (as one of my cooking instructors called him, she happened to be friends with him-they worked together at Ma Maison) has his fresh food line at Gelson's

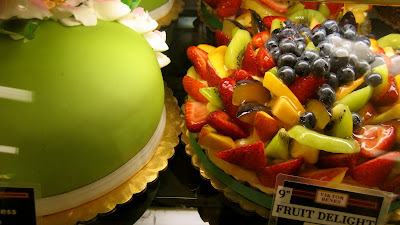
Viktor Bene's has been "Thee" Gelson's bakery since forever.
Just looking~staying on the healthy eating diet

So what did we walk out with? Oh, you were not supposed to see the hazelnut macaroons (just two). Fig preserves that go great with smoked turkey, goat cheese and caramelized onions on ciabetta. Devil's Spit barbecue sauce. French butter. Chinoiserie cocktail napkins. Mini appetizer forks and minuscule dishes~that will go great with our seafood extravaganza. Gelson's we'll be back~you have tooooo many good things not to. Where can you still get giant lobsters swimming around in a special tank or Mario Batalli's food line or caviar and on and on.